The safest way to remove sharp burrs from an L-bar with holes is to secure the angle, remove only the raised metal with a suitable deburring tool or file, and check both faces of every hole before assembly. The objective is a clean, non-sharp edge—not a larger hole, a deep countersink, or a heavily rounded profile.
A small burr can cut a hand, catch a bolt thread, or hold a washer away from the steel surface. However, forcing a bolt through a tight hole or grinding until two parts fit can hide a different problem: incorrect hole size, misalignment, distortion, or excess coating. Those conditions need to be distinguished from burrs before material is removed.
Check what is actually preventing assembly
Inspect the L-bar under good lighting, including the outer edges, cut ends, hole entrances, hole exits, and the space near the inside corner. Drilling can leave a raised lip where the drill exits. Punching can leave a sharp burr on the die side of the hole. Either process may also leave loose chips that resemble attached burrs until they are brushed away.
Use a brush to clear loose debris, then look across the surface at a low angle. Raised metal is easier to see when it casts a small shadow. A magnifier helps with small holes or thin sections. Do not slide a bare finger around an unfinished hole to locate sharp spots.
Before choosing a tool, distinguish between these conditions:
- A thin raised lip: localized excess metal at the hole edge that can be removed with light deburring.
- A heavy or folded burr: a larger projection that needs controlled filing or an appropriate powered tool.
- A distorted hole: an oval opening, displaced metal, or a damaged edge that may require approved rework rather than simple deburring.
- Coating buildup: paint or zinc restricting clearance, which needs a coating-specific decision.
- Misalignment: holes that accept the bolt individually but do not line up when the parts are brought together.
If the component belongs to a load-bearing connection, check the drawing or work instruction before cutting. Hole dimensions, edge distances, and permitted edge treatment remain controlling requirements. A burr-removal operation does not authorize slotting a hole or changing its position.
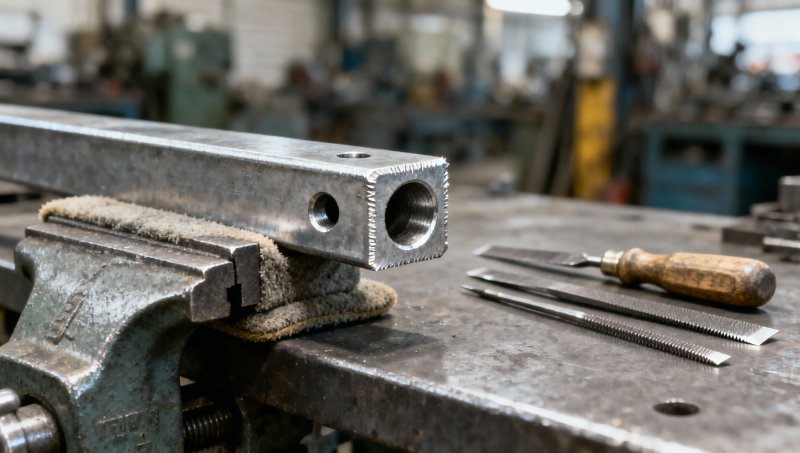
Choose a tool that removes the burr without changing the hole
For a small number of holes, hand tools provide good control and make it easier to stop at the right point. Powered tools become useful for heavier burrs or repeated work, but their speed also increases the chance of removing sound steel.
A twist drill is not the preferred finishing tool for an already correctly sized hole. Running it through again can catch, enlarge the opening, or produce another exit burr. If a hole needs resizing, treat that as a separate machining operation with its own dimensional checks.
A wire brush can remove loose chips or light surface contamination, but it is not a dependable substitute for cutting off a substantial steel burr. Abrasive paper is useful for final smoothing; it should not be used to conceal a projection that still prevents a washer from seating.
Secure the L-bar before touching the edge
Clamp the component in a vise or suitable fixture so the working area is accessible and the bar cannot rotate or slide. Protect finished surfaces with suitable jaw pads. Place support close to the hole being worked, especially on thin cold-formed angles, so tool pressure does not flex the leg.
Do not hold a small bracket in one hand while using a powered drill, rotary burr, or grinder in the other. A tool that catches can spin the part, exposing both the sharp edge and the rotating cutter. Keep clamps out of the tool path, and reposition the component when necessary rather than reaching awkwardly around the angle.
Wear eye protection for chip-producing work. Use additional face, hearing, and respiratory protection where the equipment and workplace assessment require it. Cut-resistant gloves can help when handling sharp steel and during suitable hand-tool work, but keep gloves, loose clothing, jewelry, and hair away from rotating equipment; follow the machine’s operating rules.
For powered work, confirm that the cutter or abrasive is suitable for steel and rated for the tool speed. Direct sparks away from people, combustible materials, and sensitive surfaces. Use dust extraction where required, particularly when abrading coated steel.
Remove the hole burr in small, controlled passes
Start with the clearest and most accessible face. If using a hand deburring blade, engage it lightly with the raised lip and guide it around the opening. Keep pressure consistent. A heavy push can make the blade dig in, leaving a notch instead of a smooth edge break.
After a light pass, brush away the chips and inspect again. Continue only where raised metal remains. There is no fixed number of passes that suits every hole: the stopping point depends on the burr, steel thickness, tool condition, and specified edge finish.
A countersink can remove a circular lip evenly, but it must remain centered on the hole. With a hand-operated tool, use light turns and inspect frequently. With powered equipment, use the tooling manufacturer’s speed guidance, controlled feed, and a stable setup. Stop if the tool chatters or catches; increasing pressure can make the damage worse.
The result should be a minimal edge break unless the drawing specifies a chamfer. A broad countersink reduces the flat bearing area around the hole and can interfere with washer seating. On thin steel, excessive cutting can consume a significant part of the material thickness at the rim.
For a localized burr, a fine file can be more precise than treating the entire circumference. Keep the file aligned with the projection and use controlled cutting strokes. Avoid rocking it against the hole wall, which can alter the opening. Clean a loaded file with a file brush so trapped particles do not score the surface.
Turn the angle over and repeat the inspection on the opposite face. Removing the visible entrance burr is not enough if the exit side remains sharp. Where the inside corner limits access, use a smaller appropriate tool, reposition the workpiece, or use a purpose-designed back-deburring method. Poor access is not a reason to force a large cutter into the corner.
Finish cut ends and straight edges separately
Hole deburring does not address sharp corners at the ends of the L-bar. Inspect both legs along each cut end, including the heel where they meet. Sawing, shearing, or thermal cutting can leave different edge conditions, so use the least aggressive method that removes the actual defect.
For a light saw burr, a fine flat file is often sufficient. Support the leg close to the cut end, work on the projecting metal, and finish with a small edge break if permitted. Avoid grinding a broad rounded edge simply to make the part feel smooth.
Heavy thermal-cut residue may require a different preparation process from a drilled-hole burr. If removing it exposes cracks, a deep gouge, or significant loss of section, stop and refer the part for assessment. Deburring should not disguise damage or make a visibly defective component appear acceptable.
Protect galvanized and painted surfaces
On a galvanized L-bar with holes, the raised edge may contain steel, zinc, or both. Cutting and abrasion can expose the underlying steel and remove coating beyond the burr. Keep the working area as small as practical and avoid sweeping an abrasive disc across an otherwise sound galvanized face.
Inspect the finished area for exposed substrate, lifted coating, and loose flakes. Where repair is required, follow the project specification and the approved coating-repair procedure. A quick spray of an unspecified zinc-colored paint is not automatically equivalent to a compliant repair.
Painted or powder-coated parts need similar care. A burr under the finish can cause coating to chip when removed. Do not assume that a smooth-looking paint bead is harmless if it keeps the washer from bearing correctly. Conversely, do not strip a wide area of coating merely because a bolt is tight; confirm the cause first.
Clean away chips, dust, and any machining lubricant before coating repair or assembly. Use cleaners compatible with the existing finish, and allow repaired coating to cure as specified. Otherwise, tightening the connection can damage the repair before it provides useful protection.
Check the result with the mating parts
After cleaning, inspect both sides of each hole again. A light cotton swab or disposable cloth can help reveal a snagging point, but it is only a supplementary check: fibers can catch on harmless surface texture, and some sharp edges may not snag. Avoid using bare skin as the final test.
Check hole size with the specified gauge or suitable measuring method when dimensional acceptance is required. A bolt passing through is a useful assembly check, but it does not prove that the hole remains within tolerance. For slotted holes, verify the slot ends and straight edges without rounding away their specified shape.
Bring the actual mating parts together and check that:
- The correct bolt enters without being hammered through.
- The washer sits against the intended bearing surface without rocking on a raised lip.
- The mating faces contact as intended rather than resting on burrs or trapped chips.
- No visibly enlarged opening, gouge, or coating damage has been overlooked.
If the parts still do not fit, separate them and identify the remaining interference. Do not use bolt tightening to pull a burr flat or draw misaligned holes into position. Excessive force can damage threads, distort a thin angle, or conceal a connection problem.
Know when to stop reworking
Repeated heavy burrs across a batch deserve a check of the drilling or punching process rather than progressively more aggressive hand finishing. Tool wear, unsuitable cutting conditions, inadequate support, and incorrect punch-to-die clearance can contribute to poor edges. Correcting the source reduces both rework and variation between parts.
Set aside components with cracks, torn edges, appreciably distorted holes, or openings already outside the drawing requirements. The same applies when the remaining burr cannot be removed without changing a critical dimension. Those parts need an approved disposition, not another pass with the grinder.
A properly prepared L-bar retains its specified geometry, has no obstructing raised metal, and allows the connection to seat correctly. Stop cutting when those conditions are met; additional polishing offers little assembly benefit and can remove useful steel or protective coating.
Please give us a message


Please enter what you want to find