In prestressed concrete applications, selecting the right Steel Rod high strength grade is not merely about maximizing ultimate tensile strength—it is fundamentally about engineering a controlled balance between yield strength (fy), ultimate tensile strength (fu), and post-yield elongation to satisfy both serviceability and collapse safety requirements. This balance directly governs ductility during overload events, bond development under cyclic loading, and the reliability of stress transfer at anchorages—particularly critical in bridges, long-span precast elements, and post-tensioned slabs where localized yielding must be predictable and distributed.
The yield ratio (fy/fu) serves as a key diagnostic metric—not a standalone specification. A ratio exceeding 0.92, for example, often indicates insufficient strain hardening capacity, increasing susceptibility to brittle fracture under sudden load reversal or anchorage slip. Conversely, ratios below 0.85 may suggest excessive softening or inconsistent microstructure, potentially compromising effective prestress transfer during initial jacking and subsequent relaxation. ASTM A421 (for stress-relieved wire) and A722 (for low-relaxation strand) mandate minimum elongation values (≥3.5% for A421, ≥4.0% for A722) precisely to constrain this ratio within acceptable operational bounds—yet these limits assume uniform cross-section integrity and proper heat treatment history, which cannot be verified by tensile testing alone.
Microstructural heterogeneity remains a primary source of misalignment between nominal tensile data and field performance. Rods produced via direct quenching without tempering may exhibit high surface hardness but low core ductility—leading to premature necking outside the gauge length during lab testing while masking internal embrittlement. Similarly, GB/T 5223-compliant rods with identical nominal fy and fu values can diverge significantly in fracture morphology: one may show fine dimple rupture across the entire section, indicating homogeneous plastic flow; another may display intergranular cracking near the surface layer, signaling hydrogen-assisted cracking risk under sustained tension in humid environments. Such distinctions are invisible in standard tensile reports but become decisive when evaluating fatigue resistance in cyclically loaded bridge tendons.
Bond performance further complicates the trade-off. High-strength rods rely on mechanical interlock rather than chemical adhesion for load transfer. As fy increases, surface rib geometry—pitch, height, and angularity—must be proportionally optimized to prevent localized concrete spalling before full yield is mobilized. A rod meeting ASTM A722’s tensile requirements but with rib spacing exceeding 12 mm may develop inadequate bond stiffness in low-strength concrete (e.g., C30/37), resulting in premature slip at tendon ends and non-uniform stress distribution across the member. This is not a material failure per se, but a system-level mismatch requiring coordinated specification of both rod geometry and concrete compressive strength—not just strength grades.
Thermal history during fabrication also modulates the yield ratio beyond nominal chemistry. For instance, rods drawn after hot rolling and then subjected to rapid air cooling may retain residual austenite, lowering apparent fy while preserving elongation—a behavior that improves formability during bending but reduces effective prestress retention after anchoring. In contrast, rods tempered at 420°C following quenching typically stabilize the yield ratio between 0.87–0.89, offering consistent post-yield stiffness across batches. These process-dependent effects mean that two rods certified to the same standard (e.g., GB/T 5223-2014 Class II) may exhibit different load-deflection curves under identical test conditions—not due to noncompliance, but because the standard governs only final mechanical properties, not thermal pathway consistency.
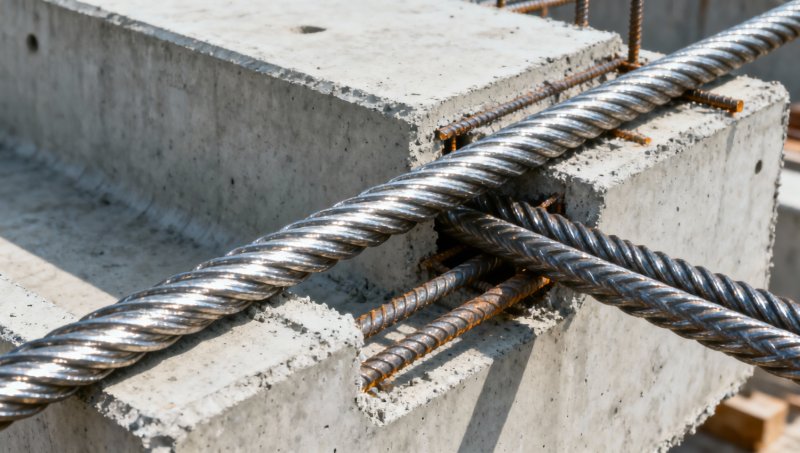
Dimensional tolerances interact critically with anchorage design. A nominal 15.2 mm strand with ±0.2 mm diameter variation alters the effective bearing area at wedge-cone interfaces by up to 5.3%. When combined with a yield ratio above 0.90, even minor undersizing can shift the failure mode from ductile strand pullout to brittle wedge fracture—especially in multi-strand anchorages where load redistribution is limited. This effect is amplified in curved ducts, where friction-induced stress gradients compound local diameter deviations. Therefore, specifying tighter diameter tolerances (e.g., ±0.1 mm instead of ±0.2 mm) becomes necessary not for strength verification, but for anchorage reliability assurance—a detail rarely captured in procurement checklists focused solely on tensile compliance.
For structural support systems integrated with prestressed concrete elements—such as composite girders or hybrid frame-slab assemblies—load path continuity demands compatible deformation characteristics. While high-strength steel rods manage axial tension, adjacent components like I Shaped Beams must sustain flexural and shear demands without inducing incompatible strain rates. Carbon steel beams conforming to Q345 or S355JR exhibit yield plateaus that align well with the post-yield hardening slope of ASTM A722 rods, enabling synchronized energy absorption. However, mismatched combinations—such as pairing A722 rods with St52 beams exhibiting sharp yield transitions—can lead to premature local buckling in the beam web before the tendon reaches its design elongation limit. This underscores that yield ratio optimization cannot be isolated to the rod alone; it must be evaluated within the full load-bearing assembly.
Creep and relaxation behavior further constrain practical yield ratio selection. Rods with lower yield ratios (e.g., ~0.84) typically demonstrate higher initial relaxation losses (up to 2.8% over 1000 hours at 70% fu), demanding higher initial jacking stresses to maintain effective prestress. Yet rods with ratios above 0.90 often exhibit steeper secondary creep rates under sustained load, particularly above 60% fy, accelerating long-term deflection in post-tensioned slabs. The optimal range—0.86–0.89—represents a compromise where relaxation loss remains manageable (<2.1% at 1000 h) while maintaining sufficient reserve ductility for seismic detailing per EN 1992-1-1 Annex C.
Field verification adds another layer of complexity. Tensile testing of cut samples provides no insight into localized defects introduced during handling—kinking, abrasion, or improper coiling—which disproportionately affect rods with narrow yield plateaus. A single 3-mm kink in a 12.7 mm rod can reduce local yield strength by up to 18% due to triaxial stress concentration, yet remain undetected in routine sampling protocols. Hence, visual inspection frequency must scale inversely with yield ratio: rods with fy/fu > 0.88 warrant 100% coil-by-coil examination, whereas those below 0.85 tolerate statistically sampled checks per ASTM E1012.
Ultimately, the tensile strength vs. yield ratio trade-off is not a static parameter choice but a dynamic interface between material science, structural mechanics, and construction execution. It requires interpreting test data in context—not just against tabulated minima, but against anticipated loading sequences, environmental exposure, anchorage geometry, and companion component behavior. Validating this interface demands traceable mill test reports, batch-specific relaxation curves, and dimensional audits—not just certificate-of-conformance stamps. Only then does “high strength” translate into verifiable structural resilience.
Please give us a message


Please enter what you want to find