Threading a galvanized pipe correctly is essential for creating leak-free and durable plumbing connections. Whether you are a professional plumber or a DIY enthusiast, mastering this technique ensures the longevity and safety of your piping system. In this guide, we will walk you through the step-by-step process of threading a galvanized pipe, providing expert tips and essential tools to help you achieve secure, professional-grade results every time.
Why Galvanized Pipe Threading Demands Respect
Threading a galvanized pipe is not exactly like threading standard black iron. The zinc coating changes the dynamics of the cut. Your primary goal is to cut clean, precise threads without tearing or peeling that protective zinc layer. If you tear the zinc inside the threaded area, you expose the bare steel to moisture, and the pipe will eventually corrode from the inside out, leading to pinhole leaks.
The zinc also adds a slight layer of hardness and can be gummy when heated. If your cutting tools are dull, or if you don't use the right lubrication, the friction will generate excessive heat. This heat can melt the zinc, causing it to weld onto your die teeth, which ruins both the thread quality and your tool. Patience and the right setup are non-negotiable here.
Gathering the Right Gear
You cannot cut good threads with compromised tools. A standard pipe die and a sturdy ratchet handle are your baseline requirements. Ensure the die is specifically sized for your pipe (e.g., 1/2-inch NPT) and that the teeth are sharp and free of old, caked-on metal chips. Dull teeth will tear the metal rather than shear it cleanly.
Then there is the cutting oil. Never, ever use motor oil, WD-40, or random household lubricants for threading. They lack the extreme pressure (EP) additives required for metal cutting. Without proper EP additives, the friction will gall the steel. You need a dedicated sulfur-based or chlorinated pipe threading oil. Apply it generously before you start and reapply frequently. If the oil starts smoking or turning thick and black, you are either running the die too fast or not applying enough lubricant.
You will also need a sturdy vise to hold the pipe, a wire brush for cleaning, and a deburring tool. A pipe reamer is highly recommended to clean the inside edge of the pipe after cutting, ensuring no metal shavings restrict water flow or damage downstream valves.
The Threading Process: Step-by-Step
Start by securing the pipe in your vise. Tighten it enough so it doesn't spin, but avoid crushing the pipe, which will distort the round shape and make it impossible to get a straight thread. The pipe should extend just far enough out of the vise to allow the die to pass completely over the end, plus the length of the thread you need.
Slip the die onto the pipe. It is critical to start the die perfectly square to the pipe. If it goes on crooked, the threads will be cross-threaded and will never seal properly. Turn the ratchet clockwise slowly, applying downward pressure until the teeth bite into the metal. Once it catches, you can stop pushing down.
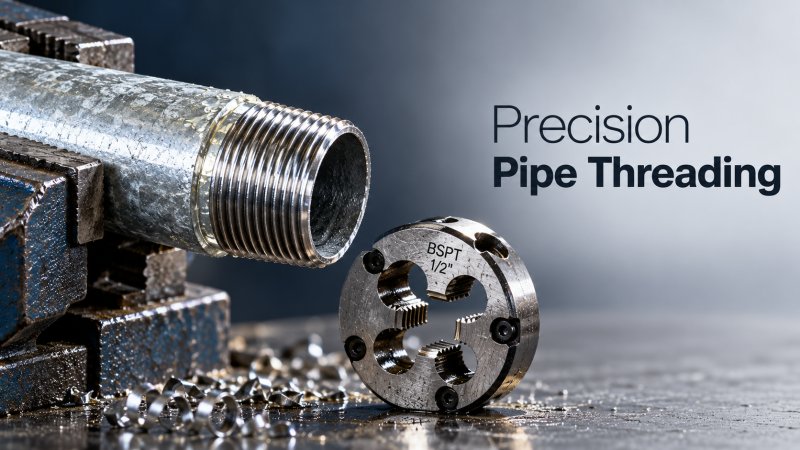
Now comes the most important technique in manual threading: the "quarter turn back" rule. Turn the ratchet forward about a quarter to a half turn to cut the metal, then reverse it a quarter turn to break the chip. Metal has to go somewhere when you cut it. If you just keep turning forward, the chips will pack tightly inside the die, increasing friction, tearing the zinc, and eventually jamming the tool so hard it could snap the pipe. Breaking the chip clears the path and keeps the cut clean.
Keep the die square as you work your way down the pipe. Check your progress frequently. Once you reach the desired thread length, reverse the ratchet to back the die off the pipe. Do not just pull it off sideways, or you will damage the newly cut threads.
Material Context and Common Pitfalls
In the broader steel industry, material properties dictate the approach. For instance, when dealing with heavy structural components like a Rail used to guide rolling stock and bear massive dynamic loads, the focus is on macro-structural integrity and specific alloy compositions. Galvanized plumbing pipes, on the other hand, are usually low-carbon steel. They are softer, which means the die can cut them easily, but it also means the threads can strip if you force them or don't clear the chips properly.
A common mistake is rushing the job. Forcing the ratchet when the die meets resistance is a guaranteed way to ruin the thread. If it gets hard to turn, back it out, clear the chips with a wire brush, apply more oil, and try again. Another frequent error is using a die that doesn't match the pipe schedule. While standard NPT dies work for Schedule 40, trying to thread a thicker Schedule 80 pipe with a standard die will result in incomplete threads that won't seal under pressure.
Cleaning, Sealing, and Assembly
Once the threading is done, clean the pipe thoroughly. Use a wire brush to remove all metal shavings and excess cutting oil. Be careful not to scrub so hard that you remove the zinc coating on the outside of the pipe. Blow out the inside of the pipe with compressed air if possible, or use a pipe reamer to ensure no debris is left behind.
There is an ongoing debate in the plumbing world about Teflon tape versus pipe dope. For galvanized pipes, a good quality pipe dope (thread sealant) often works better because it fills the microscopic gaps in the threaded joint and lubricates the assembly, allowing you to torque it tighter. If you prefer Teflon tape, wrap it clockwise (looking at the end of the pipe) so it doesn't unravel when you screw the fitting on. Leave the very first thread bare. If you cover the first thread, the tape can get pushed inside the pipe, restricting water flow or getting caught in downstream valves.
When assembling, hand-tighten the fitting first to ensure it threads smoothly. If it binds up by hand, back it out and check for damaged threads. Once hand-tight, use two pipe wrenches—one to hold the pipe and the other to turn the fitting. Tighten it to the proper torque, usually 2 to 3 turns past hand-tight, but avoid over-tightening, which can crack galvanized fittings. Take your time, respect the material, and you will build a plumbing system that holds pressure and lasts for decades.
Please give us a message


Please enter what you want to find