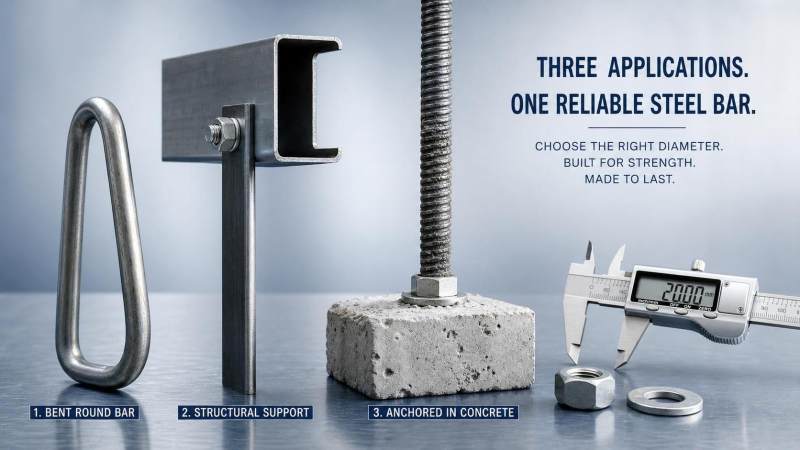
When people ask about steel rod diameter, they often want one number. That is usually the wrong starting point. The right diameter depends on what the rod is actually doing: being bent into shape, carrying load as support, or holding something in place as an anchor. A rod that works well for a simple bracket may be a poor choice for a tight bend or a high-pull anchoring point. If you want a practical answer, check the job in the same order the load will reach the steel.
Start with the failure you cannot accept. For bending work, that is usually cracking, flattening, or losing shape during fabrication. For support, it is deflection, buckling, or long-term sag. For anchoring, it is pull-out, thread damage, concrete breakout, or loosening in service. Once that is clear, diameter selection gets much easier because you are no longer choosing by habit.
Check the real job before you look at the rod size
Operators run into trouble when they jump straight to diameter without confirming the working conditions. Before comparing sizes, write down these five points:
- What load is acting on the rod: static weight, impact, vibration, tension, compression, or mixed loading.
- Whether the rod will be bent cold, bent hot, threaded, welded, or embedded.
- How much installation space is available around the rod.
- What base material is involved: steel plate, masonry, timber, or concrete.
- Which material grade and standard the project is using, such as ASTM, EN, JIS, or GB.
That last point matters more than many buyers expect. Two rods with the same diameter can behave differently if the steel grade, manufacturing method, or standard is different. Diameter alone does not tell you strength.
For bending, focus on bend radius before you chase thickness
If the rod must be formed on site or in the workshop, the first question is not “How thick can I make it?” but “How tight is the bend?” Thick rods resist deformation, but they also demand more force, larger tools, and a wider bend radius. If the bend is too tight for the chosen diameter and grade, surface cracking or distortion is a real risk.
A good shop-floor check is simple:
- Confirm the inside bend radius required by the drawing or tooling.
- Match that radius to the steel grade and forming method.
- Check whether the rod will be bent once or rebent during fit-up.
- Inspect for coating damage if the rod is galvanized or otherwise finished.
One common mistake is using a larger rod diameter to “play safe” on strength, then discovering the part cannot be bent accurately with available equipment. Another is selecting a small diameter that bends easily but later straightens under service load. In bending applications, diameter has to fit both fabrication and final use.
For support, check span and restraint, not just weight
Support rods fail less often by sudden breakage than by excessive movement. A rod that looks strong enough on paper may still deflect too much if the span is long or if the ends are not restrained well. This is where people underestimate the effect of diameter. A small increase in rod size can significantly improve stiffness, which may matter more than ultimate strength in supports, hangers, braces, or light frames.
When judging a support application, check:
- Unsupported length. Long, slender rods are more likely to bend or buckle.
- Direction of load. Compression is less forgiving than pure tension.
- Connection detail. Washers, plates, sleeves, and brackets can shift stress into a small area.
- Service movement. Vibration, repeated loading, and thermal cycling can loosen marginal supports.
If the rod is supporting a secondary steel member or a cold-formed section, do not size the rod in isolation. The connected member may be the weak point. In light structural assemblies, the support rod and the receiving section need to work together. For example, when a project uses C Beam Steel for purlins, wall beams, brackets, or light manufacturing frames, the rod diameter should be checked against the section thickness, hole size, and connection detail, not just the overall load path.
For anchoring, the base material often decides the usable diameter
Anchoring is where many diameter decisions go wrong. People focus on the steel rod and forget that the surrounding material may govern the result. In concrete, larger diameter does not automatically give a better anchor if embedment, edge distance, spacing, or concrete condition are poor. In steel plate connections, the rod may be adequate while the hole, weld, or plate thickness is not.
Use this anchoring check before choosing size:
If you are anchoring into concrete or masonry, check the anchor layout drawing and the installation document for the exact hole diameter, embedment depth, and edge distance. Those three items usually settle whether the proposed steel rod diameter is realistic.
Do not separate diameter from material grade and finish
A rod is not just a diameter. Grade, finish, tolerance, and processing all shape the result. If the project spec calls for ASTM, EN, JIS, or GB compliance, make sure the purchase document and mill or inspection paperwork refer to the same standard family used by the design side. This matters when you compare imported and locally sourced materials.
Surface treatment also changes practical fit. Galvanized rods can perform well in corrosive environments, but coating thickness affects threads, hole fit, and bend appearance. Powder-coated or painted parts can be fine for some assemblies, though they are not a substitute for choosing the correct diameter and base material in an anchor or load-bearing application.
In related structural systems, it is normal to match rod decisions with the steel sections being fabricated. A cold-formed profile such as C Beam Steel, available in materials like Q195, Q235, Q345, A36, SS400, and S235JR and produced for uses such as purlins, wall beams, roof trusses, brackets, columns, or light manufacturing arms, shows why this matters: the connection detail, thickness range, and processing method often matter as much as the nominal rod size.
Watch for these selection mistakes on site
A few errors show up again and again:
- Choosing by visual similarity. A rod that “looks close enough” can behave very differently under load or during bending.
- Ignoring installation tools. Larger diameters may need different dies, drills, torque tools, or hole preparation.
- Mixing standards without checking dimensions. Nominal size, tolerance, and thread compatibility are not always interchangeable.
- Overbuilding low-risk parts and underchecking critical ones. Extra diameter in a noncritical brace adds cost; missing stiffness in a support point creates rework.
- Forgetting transport and handling. Long rods with small diameter can be damaged or bent before they ever reach installation.
A practical order for making the decision
If you need a clean working sequence, use this one:
- Define the job as bending, support, anchoring, or a combination.
- Identify the dominant risk: cracking, deflection, buckling, pull-out, or installation mismatch.
- Check the drawing, standard, and material grade together.
- Review the base material or connected member, not only the rod.
- Confirm fabrication limits: bend radius, threading, coating, hole size, and tool capacity.
- Then compare candidate diameters and reject the ones that fail any of the above checks.
That sequence saves time because it removes bad options early. It also keeps the conversation between purchasing, fabrication, and installation grounded in the same facts.
The best steel rod diameter is not the biggest one or the easiest one to source. It is the one that matches the actual load, the forming method, the base material, and the connection detail without creating unnecessary cost or installation trouble. For most operators, the right move is to check the application in that order, then size the rod only after the surrounding conditions are clear.
Please give us a message


Please enter what you want to find